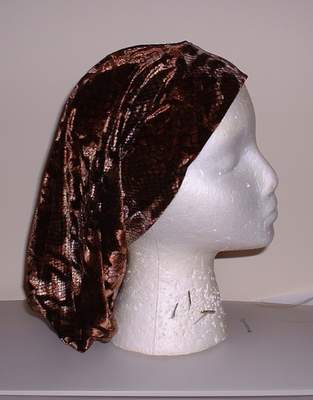
This is a pattern to make a sewn, fabric snood like the one
on the left. Shoshana has generously shared her pattern, please
consider this for personal or charity use only. Thanks again
Shoshana!
The pattern has two pieces. You cut out one band and two back or
bag pieces. The pattern pieces were both too large to fit on my
scanner. So I scanned the pieces from one side,
and then I turned it around and scanned it from the other side.
You should be able to print out the pieces and realign them by
the text directions printed in various places.
Here is the front of the band in front of the snood.
The band was too long for my scanner by about 1 1/2 inches. You can
just add length on your own, or use this
scan from the other side and tape 'em together. This piece is
simply a rectangle - measuring 12 inches by 5 1/2 inches.
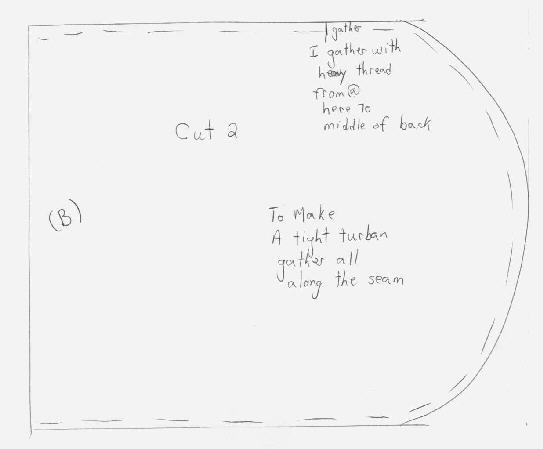
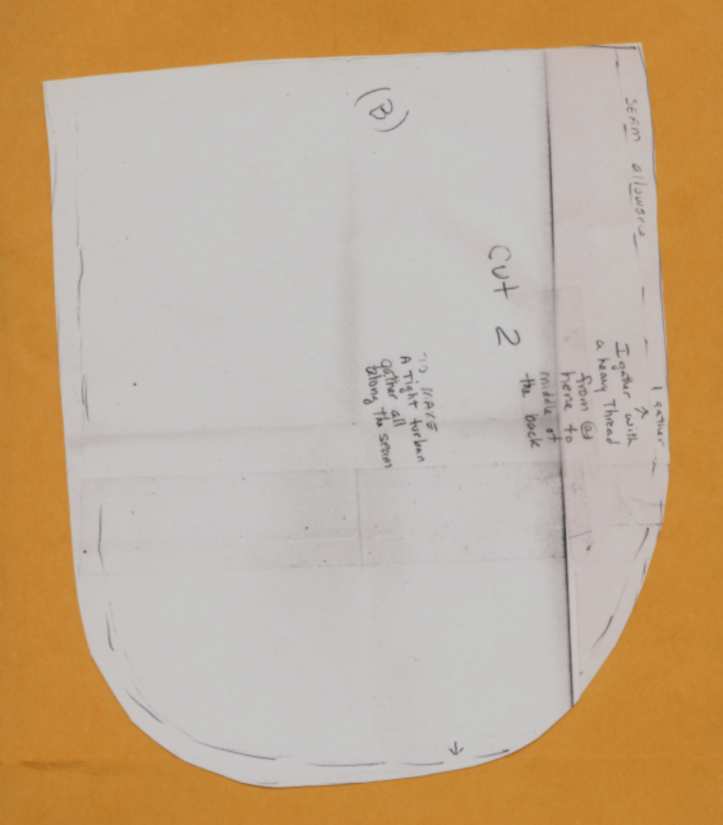
And now for the 'bag' part. This is composed of two identical "U"
shaped pieces. The width of the flat front of the "U" is 12 inches
and it extends back for 15 inches. You can cut out a 12" by 15"
rectangle and round the back of the short end.
Or you can print this out - it was scanned in four quarters.
I've recently noticed that the printout runs over a single page for
each scanned quarter, making an awful jigsaw puzzle and quite a mess!
I tried several ways of re-scanning it to fit a single printer page,
but I have been unsuccessful. So, here is a drawing - sort of to scale
of the image.
So now, you can take
the measurements above and use the instructions on the mini image to
guide you, or you can certainly print out the jigsaw puzzle, and hopefully
this will give some guidance on how to align the pieces! And
here is (hopefully!) a 50% scale scan of
the image.
Piece A and Piece 1
are one side of the "bag"
and Piece B and Piece 2 are the
second side of the "bag".
Pieces 1 and 2 are the rounded back end of the rectangle.
There are instructions to assemble the pieces on the pattern pieces themselves.
Basically sew the two bag pieces together (right sides together), and gather
the rounded edge. Turn the piece right side out. The seam will run from the
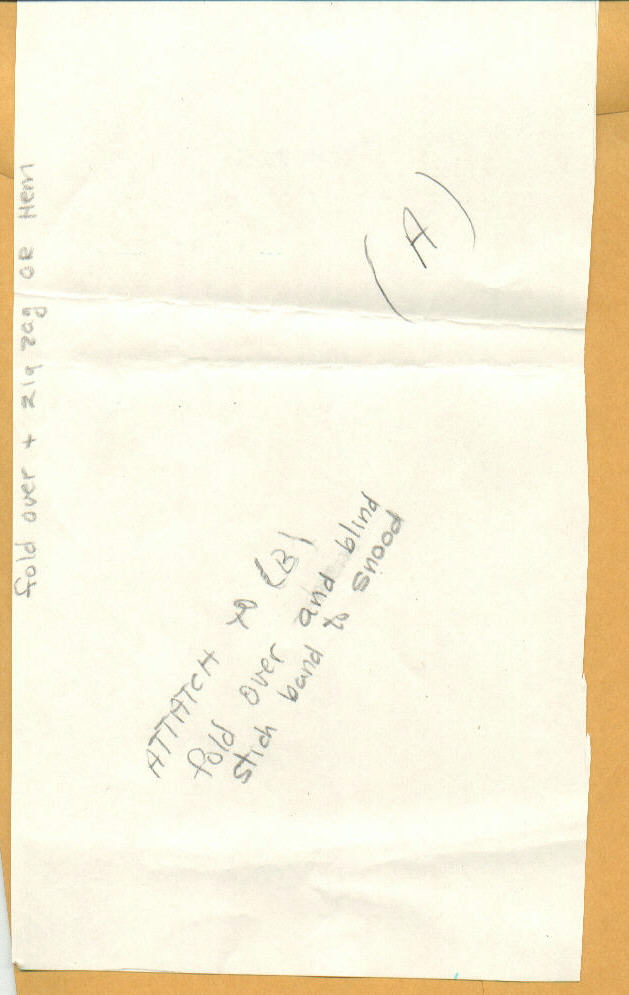
center of the forehead to the nape of the neck. Fold the band over (right
side out) and stitch it to the bag, raw edges together. Have the ends of the band
meet at the back seam, at the base of the neck. Fold the band down and stitch
the ends together. You can adjust for headsize by adjusting the length of the band.
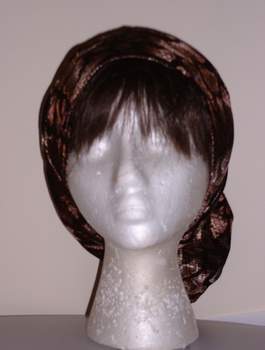
Voila - a snood.
Some tips: Use a stretch fabric for the band so that it will fit snugly.
For the back use a fabric with a soft drape so that it hangs softly. Slinky
or stretch panne velvet both work nicely for both pieces. The sample I have up
is a stretch panne velvet. A cotton knit makes a comfy weekday snood.
And to make a matching, or co-ordinating extra band,
here's the pattern for that.
When complete, the snood should resemble the pictured snood at
this site (but with a plain band in front - unless you improvise a twist!)
Like the page? Leave me a line or two in my
guestbook. I'd love to know how you found us! Also - please let me
know about any broken links, I'll remove/fix them ASAP! View My Guestbook Sign My Guestbook
 This is a pattern to make a sewn, fabric snood like the one
on the left. Shoshana has generously shared her pattern, please
consider this for personal or charity use only. Thanks again
Shoshana!
This is a pattern to make a sewn, fabric snood like the one
on the left. Shoshana has generously shared her pattern, please
consider this for personal or charity use only. Thanks again
Shoshana!
 Some tips: Use a stretch fabric for the band so that it will fit snugly.
For the back use a fabric with a soft drape so that it hangs softly. Slinky
or stretch panne velvet both work nicely for both pieces. The sample I have up
is a stretch panne velvet. A cotton knit makes a comfy weekday snood.
Some tips: Use a stretch fabric for the band so that it will fit snugly.
For the back use a fabric with a soft drape so that it hangs softly. Slinky
or stretch panne velvet both work nicely for both pieces. The sample I have up
is a stretch panne velvet. A cotton knit makes a comfy weekday snood.
